

Professional technician installing structured network cabling through open wall in modern office building with organized blue Ethernet cable bundles
Network Cable Installation Guide

Here's the reality: your building probably needs better network cabling than it has right now. Maybe you're tired of Wi-Fi dead zones in your home office. Or perhaps you're managing an office where employees complain about dropped video calls. Either way, you're looking at a cabling project—and if you've never done one before, the process might seem more complicated than it actually is.
Let's break down what you need to know.
What Is Network Cable Installation and When Do You Need It?
Think of network cable installation as creating permanent Ethernet highways throughout your building. You're not just plugging in a cable between your laptop and router—you're opening walls, fishing cables through tight spaces, mounting jacks, and building the physical foundation that'll carry data for the next 15-20 years.
There's a difference between "structured cabling" and simpler projects. Structured systems follow formal industry blueprints, especially in commercial buildings. You'll see dedicated equipment rooms, organized patch panels, labeled cables, and proper documentation. It's comprehensive and methodical. Simpler residential jobs? Maybe you're just pulling three cables through your basement to reach upstairs bedrooms. Less infrastructure, fewer components, but still requires careful work.
For homes, you'll typically consider installation in specific situations. Building new construction lets you wire everything before drywall goes up—the easiest time to do it. Finishing a basement? That's your chance to add network drops without ripping open finished walls later. Setting up a serious home office means you'll want reliable wired connections instead of depending on Wi-Fi that slows down when the kids start streaming. Smart home enthusiasts often discover that hardwired connections for security cameras, smart hubs, and access points perform dramatically better than wireless alternatives.
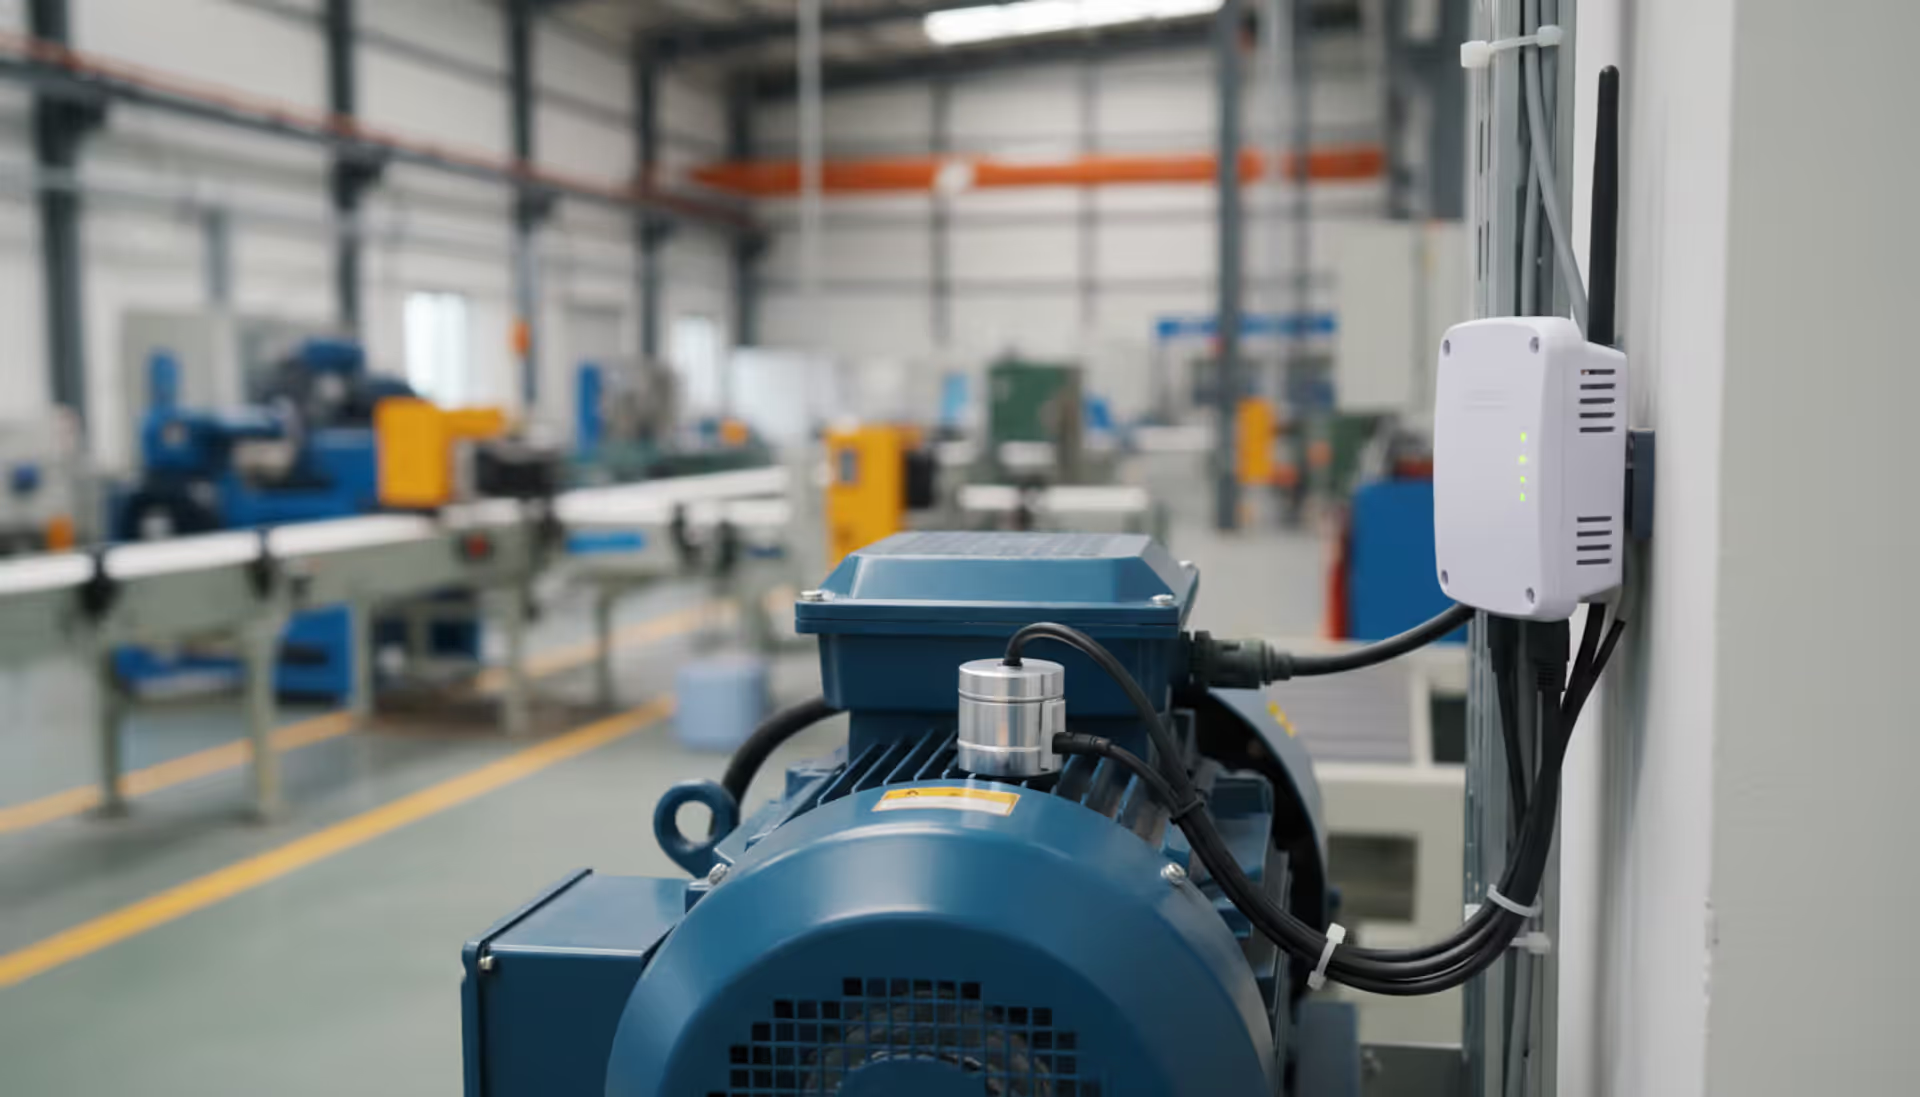
Commercial projects operate on a different scale entirely. Picture an office building: every desk needs at least one drop, many need two. Conference rooms might need six or eight connections for video systems, laptops, and phones. Server rooms become dense jungles of cables connecting switches, routers, and storage systems. Warehouses need ruggedized industrial cabling. Retail stores require network drops for every point-of-sale terminal, plus connections for inventory systems and security equipment.
You'll know it's time to call professionals when Wi-Fi consistently disappoints despite good equipment, when you're planning to add five or more wired devices in areas that currently have no jacks, when renovation projects leave walls open (don't waste the opportunity), or when business operations depend on guaranteed network performance. Home lab enthusiasts—people running servers, network attached storage, and multiple computers—quickly discover that proper cabling prevents the nightmarish spaghetti mess that makes troubleshooting impossible.

Author: Caleb Merrick;
Source: clatsopcountygensoc.com
How to Plan Your Network Cable Installation Project
Bad planning leads to expensive corrections. Start by walking your space with a floor plan and marking every single location that needs a connection. Grab a measuring tape—Ethernet maxes out at 328 feet (100 meters) from switch to device, and you need to account for the actual cable path, not straight-line distance.
Here's a pro tip most homeowners miss: install more drops than you currently need. Adding an extra jack during initial installation might cost $50. Coming back to add it after walls are closed? That's $250-400. In my experience reviewing dozens of projects, people almost always wish they'd added more drops initially.
For residential planning, think through likely furniture arrangements. Where might you relocate your desk in three years? Could that spare bedroom become an office? Will you mount a TV on that wall someday? In offices, account for growth—plan for 20-30% more workstations than you currently have.
Cable selection confuses people unnecessarily. Cat5e handles Gigabit speeds (1,000 Mbps) fine for most homes. Cat6 pushes to 10 Gigabit up to 180 feet and gives you better protection against interference—it's become the default choice in 2026. Cat6a maintains 10 Gigabit for the full 328-foot distance and includes heavier shielding, making it the commercial standard for future-proofing.
The secret? Material costs barely differ between categories. You might pay $20-40 more per drop for Cat6 versus Cat5e. Since labor represents 75-80% of project costs, that difference is negligible. Many installers automatically recommend Cat6 as the minimum. You're already opening walls—don't handicap yourself with outdated cable to save $150 on a $3,000 project.
Route mapping requires understanding your building's anatomy. Can cables run through the attic? Is there basement access? Are there existing conduits? You'll need to identify obstacles: fire blocking between studs, HVAC ductwork, load-bearing beams. Commercial buildings typically use suspended ceiling spaces or dedicated cable trays for horizontal runs, with vertical shafts connecting floors.
Permit requirements vary wildly by location. Some jurisdictions require permits for any low-voltage work; others don't care about residential projects. Fire codes universally mandate plenum-rated cable in air-handling spaces—that's the space above drop ceilings where HVAC operates. Multi-family buildings often restrict how you can route cables between units. Before buying anything, verify what's required in your area. A $75 permit beats a $1,000 fine and having to redo work.
Network Cable Management Best Practices During Installation
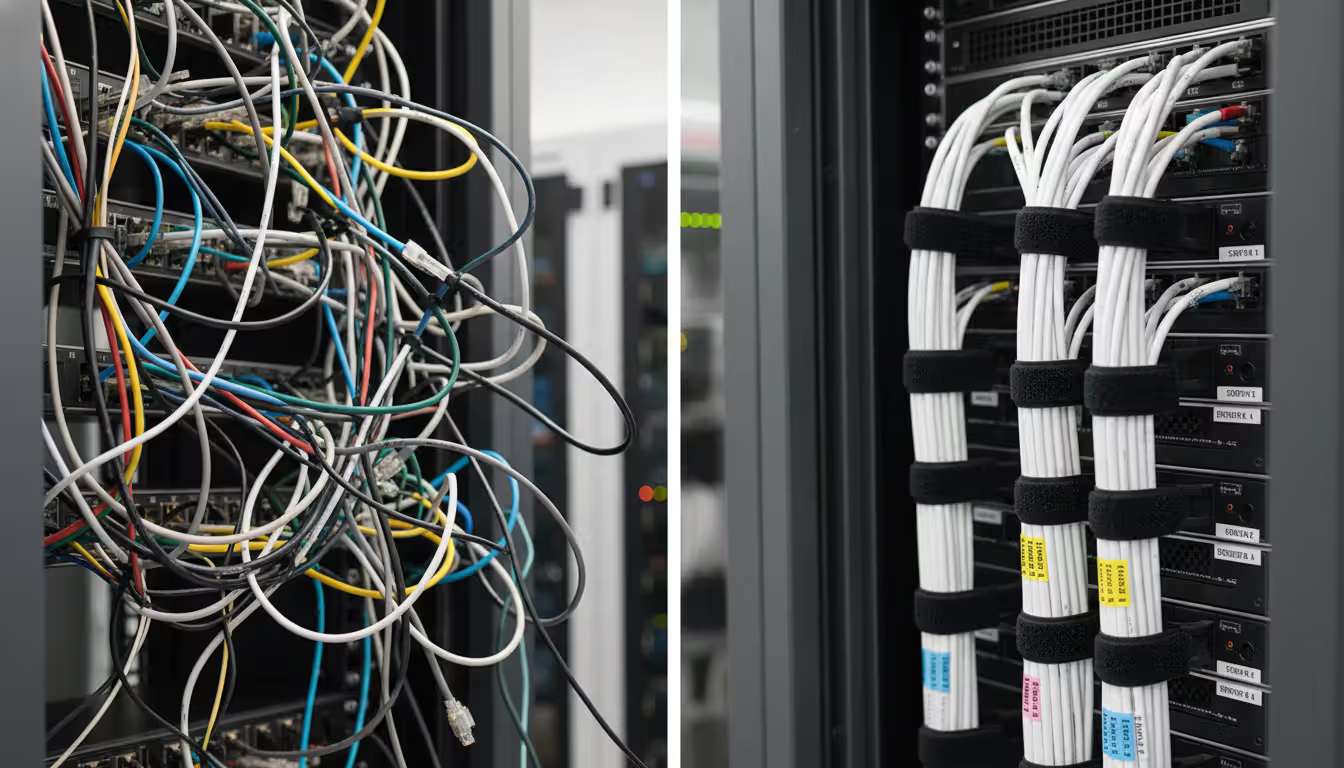
Cable management isn't something you fix after installation—it happens during the work, or it doesn't happen at all. Messy installations create headaches that compound over years.
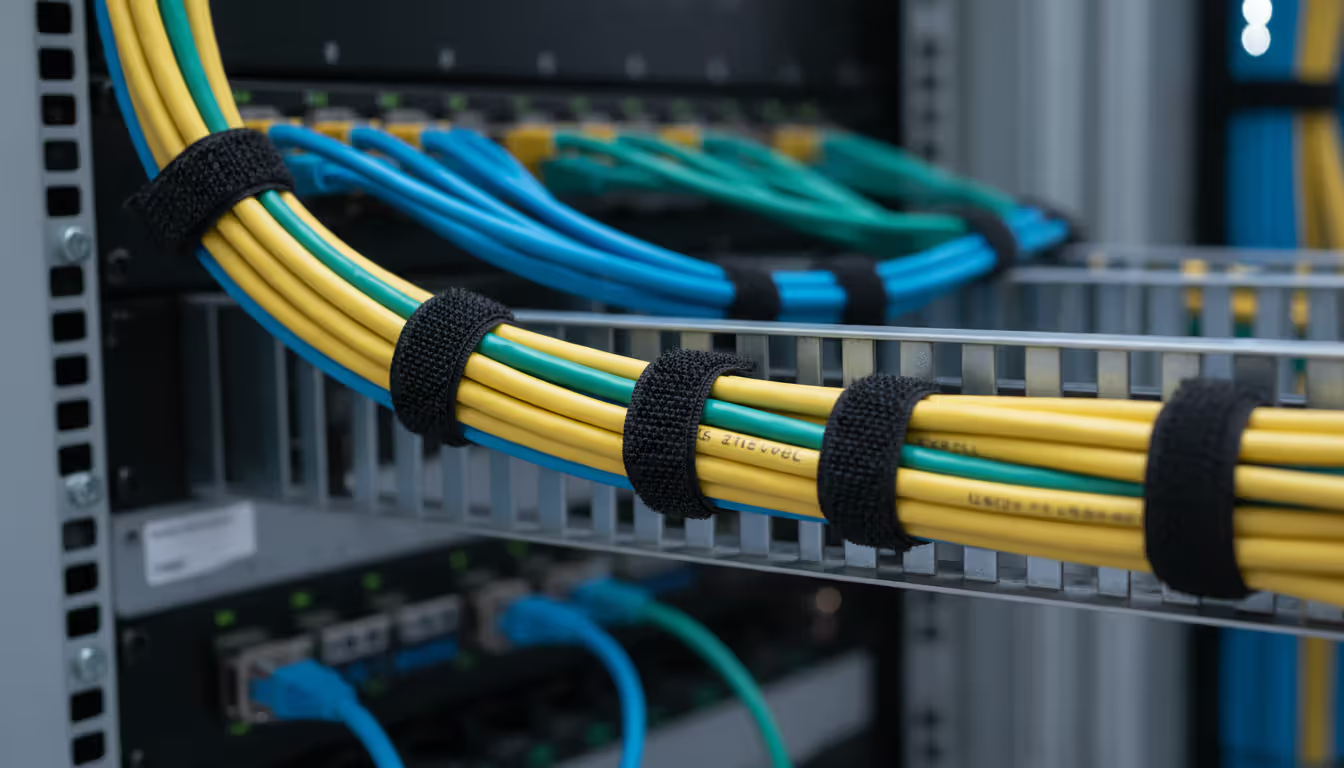
Bundle cables together, but never overtighten them. Excessive compression actually deforms the cable geometry inside, causing crosstalk between wire pairs. Use Velcro straps, not zip ties. Velcro allows adjustments later without cutting anything open, and you won't accidentally crank down too hard and damage cables. Keep bundles at least 12 inches away from electrical wiring when running parallel—electromagnetic interference from power cables can degrade network performance.
Here's something most DIYers get wrong: bend radius matters enormously. Never bend Ethernet cables tighter than four times the cable diameter. Those sharp 90-degree bends? They're destroying the carefully twisted wire pairs inside, degrading performance even if the cable technically "works." Use smooth curves at corners. In cable trays, use proper bend-radius guides. At patch panels, create service loops—gentle coils that provide slack without kinking.
Future-proofing saves massive money. Run two cables to each location instead of one—costs maybe $30 extra now, saves $300 if you need it later. Install conduits larger than currently necessary so you can pull additional cables in 10 years without demolition. Commercial planners typically design for 25-50% growth over a decade. Technology evolves constantly, but physical infrastructure remains static—overbuilding capacity now is cheap insurance.
Document everything before closing walls. Take photos of cable routes showing exactly where they run behind drywall. Mark photos with measurements from fixed reference points. I've seen troubleshooting projects waste days because nobody documented where cables ran. Three photos during installation prevent hours of frustration later.
Author: Caleb Merrick;
Source: clatsopcountygensoc.com
Network Cable Labeling Standards You Should Follow
Proper labeling transforms chaos into a manageable system. The specific standard matters less than consistency—pick a system and stick to it religiously.
Label both cable ends before terminating connections. Invest in a real label maker that produces durable, adhesive labels—those cheap stick-on tags peel off within months. Every label needs a unique identifier matching your documentation. Something like "2F-205-J1" works well: second floor, room 205, jack 1.
The TIA-606-C standard provides comprehensive labeling frameworks for commercial work. It specifies what goes on labels, where to place them, and color-coding schemes. Cables get identifiers based on network hierarchy. Patch panels, racks, and equipment all receive consistent labels cross-referencing your master documentation.
Residential projects can use simpler approaches. "Office-1" and "Office-2" clearly identify two drops in a home office. "MasterBR-West" tells you exactly which bedroom jack you're looking at. The critical element isn't formality—it's creating a system you'll understand five years later when you've completely forgotten the original layout.
Color coding adds visual organization that speeds work. Use different colored cables or labels for different purposes: blue for standard data connections, red for security cameras, yellow for wireless access points, green for VOIP phones. This visual system helps tremendously when troubleshooting or when preventing accidental disconnections during maintenance.
Cable Pathway and Containment Methods
How you route and protect cables affects both installation difficulty and long-term performance. Choosing appropriate pathways depends heavily on building type.
Residential work typically means threading cables through wall cavities, attics, and basements. Fish tape or rods help pull cables through finished walls—drill holes through studs at consistent heights to create clean horizontal runs. Install metal nail plates over holes protecting cables from future drywall screws or errant nails during renovations.
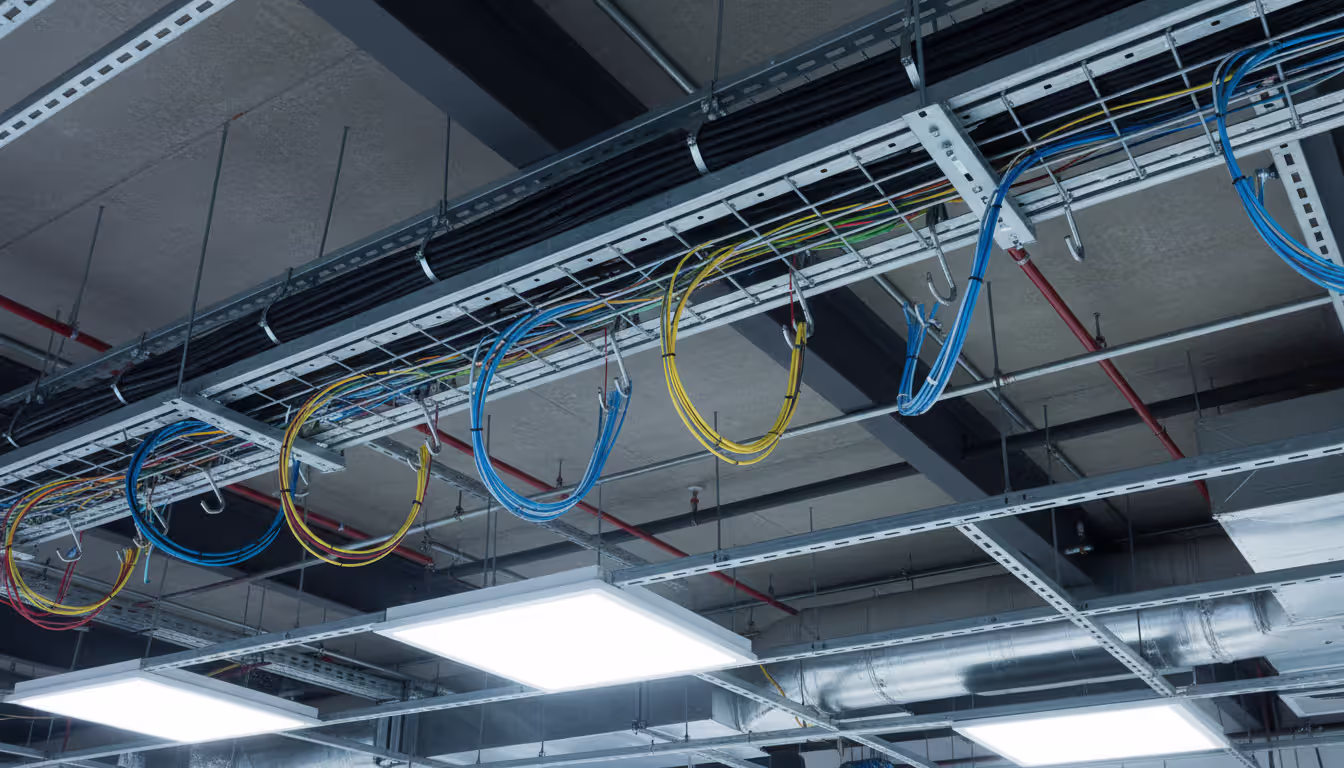
Commercial buildings use systematized pathways. Ladder racks and cable trays in ceiling spaces handle organized horizontal distribution. Vertical risers—often in dedicated shafts—carry cables between floors. Conduit protects cables in exposed locations or where local codes demand it.
J-hooks suspended from ceiling structures offer flexible, economical solutions for plenum spaces. Install them every 4-5 feet to support cable weight without sagging. Keep different cable types separated—never mix power and data cables on identical support systems, regardless of what that rushed contractor suggests.
Raised floor systems in data centers provide exceptional cable management. Cables run beneath the floor in organized bundles, keeping workspaces clean while allowing easy reconfiguration. Use vertical managers on racks and horizontal managers between equipment to maintain organization at termination points.
Author: Caleb Merrick;
Source: clatsopcountygensoc.com
Network Cable Certification and Testing Requirements
Testing confirms your installation actually meets performance specifications. Two distinct levels exist: verification and certification. Understanding this difference helps you decide what your specific project requires.
Verification uses basic testers checking for continuity, correct wiring, and simple performance metrics. These tools confirm cables function but don't generate detailed performance data. Verification costs less and works adequately for straightforward residential projects where you're confident in workmanship quality.
Certification employs sophisticated equipment measuring every performance parameter defined in industry standards: insertion loss, return loss, near-end crosstalk (NEXT), alien crosstalk, and numerous others. Certification equipment generates comprehensive reports proving installations meet Cat5e, Cat6, or Cat6a specifications. These reports become permanent documentation demonstrating compliance.
When is certification actually required? Building codes rarely mandate it for residential work, though some homeowners request it for peace of mind or resale value. Commercial installations increasingly require certification—particularly buildings with structured cabling warranties. Equipment manufacturers frequently require certified cabling for warranty coverage on switches, routers, and other hardware.
Financial institutions, healthcare facilities, and government buildings typically mandate certification. When networks support critical operations, certification proves cabling won't become the failure point. Business continuity insurance policies sometimes require it as a coverage condition.
Test reports document entire installations comprehensively. They show cable lengths, test parameters with margins (revealing how close measurements came to specification limits), and identification of each tested link. Store these reports permanently. They prove due diligence if problems surface and establish baseline data for future troubleshooting.
Certification isn't really about today's requirements—it's proving your infrastructure handles tomorrow's applications. I've watched businesses face expensive re-cabling because they skipped certification during initial installation, then later discovered cables couldn't support higher speeds. That certification cost? It's insurance against future obsolescence
— Michael Torres
Network Cable Certification Cost Factors
Certification adds project costs while providing valuable assurance. Understanding cost drivers helps with accurate budgeting and quote evaluation.
Equipment costs drive certification pricing substantially. Professional certifiers invest $5,000-$15,000 in test equipment requiring annual calibration. These costs distribute across projects, typically adding $50-$150 per drop depending on project size. Larger projects achieve lower per-drop costs because setup time amortizes across more tests.
Certification level affects pricing considerably. Basic Cat5e certification costs less than Cat6a because test parameters are simpler and faster. Testing to higher frequencies demands more sophisticated equipment and extends per-drop testing time.
Project complexity creates significant variables. Testing drops in an open office with centralized patch panels proceeds quickly. Testing cables running through multiple floors with intermediate connection points takes substantially longer. Difficult access to cable terminations increases labor time dramatically.
Documentation requirements impact costs noticeably. Basic certification provides simple pass/fail results. Comprehensive documentation includes detailed reports for every link, organized documentation matching your labeling system, and professional binding in permanent reference binders. Enhanced documentation adds cost while providing maximum value.
Expect to pay $75-$200 per drop for professional certification in typical commercial projects. Residential certification, when requested, might run $50-$100 per drop. Projects with dozens or hundreds of drops achieve significantly lower per-unit costs. Some installers include basic verification in installation pricing and charge extra only for formal certification.
Network Cable Installation Pricing Breakdown
Installation costs vary dramatically based on project scope, building type, and regional labor rates. Understanding pricing components helps with quote evaluation and accurate budgeting.
Per-drop costs—the price installing one network connection—range from $150 to $500 in residential settings. Simple installations in unfinished basements might hit the lower end. Running cables through finished walls on multiple floors pushes toward the higher end. Average single-drop installation in finished homes costs $200-$300.
Commercial pricing operates differently. Per-drop costs decrease with project size through efficiency gains. Small office installations might cost $200-$350 per drop. Large projects with 50+ drops might achieve $150-$250 per drop. High-rise buildings with complex pathways and long vertical runs can exceed $400 per drop.
Here's the labor versus materials breakdown that surprises most people: cable itself is cheap—Cat6 costs $0.10-$0.30 per foot. A typical 150-foot run uses $15-$45 in cable. Add a keystone jack ($3-$8), wall plate ($2-$5), and patch panel port ($5-$15), and materials total $25-$75 per drop. Labor comprises 70-85% of installation costs.
This labor-heavy ratio explains why upgrading cable categories adds minimal cost. The difference between Cat5e and Cat6 cable might be $10-$20 per drop, but labor remains identical. Smart buyers specify Cat6 or Cat6a for minimal incremental investment.
| Project Type | Cable Category | Cost Per Drop | Certification Fee | Typical Project Total |
| Home (1-5 drops) | Cat5e | $200-$300 | $50-$100 (optional) | $400-$1,500 |
| Home (1-5 drops) | Cat6 | $225-$325 | $75-$125 (optional) | $450-$1,625 |
| Small Office (10-25 drops) | Cat6 | $175-$275 | $100-$150 per drop | $2,750-$10,625 |
| Large Office (50+ drops) | Cat6 | $150-$225 | $75-$125 per drop | $11,250-$17,500 |
| Large Office (50+ drops) | Cat6a | $175-$275 | $100-$150 per drop | $13,750-$21,250 |
Several factors increase installation costs significantly: difficult access like tight crawl spaces or no attic access, long cable runs exceeding 150 feet, running cables through concrete or masonry walls, extensive fire-stopping requirements in commercial buildings, and work in occupied spaces requiring after-hours installation. Historic buildings with preservation requirements can double or triple typical costs.
Getting accurate quotes demands detailed information. Provide installers with building plans showing drop locations, describe building construction type, specify cable category requirements, clarify whether certification is needed, and explain any access restrictions or timing requirements. Vague requests generate vague quotes leading to disputes.
Request itemized quotes separating materials, labor, testing, and additional services. Compare quotes on equal terms—some installers include patch cables and faceplates while others charge extra. The lowest quote isn't always the best value if it skips important steps or uses substandard materials.
Common Network Cable Installation Mistakes to Avoid
Even experienced installers occasionally cut corners or make errors. Knowing common mistakes helps you avoid them in DIY projects and recognize warning signs when hiring contractors.
Poor cable management creates immediate and persistent problems. Leaving excess cable in tangled piles makes troubleshooting impossible. Mixing cables from different runs in identical bundles complicates future changes. Failing to secure cables properly leads to sagging and stress on terminations. Professional work looks organized and intentional—if the installation looks messy, it probably performs poorly.
Skipping testing is false economy that catches up with you. You might get lucky and have everything work initially, but undiscovered problems surface later when they're harder to diagnose and more expensive to fix. Testing during installation, before closing walls, catches problems when they're easy to address. Testing after installation completion provides baseline documentation. Installers who resist testing are probably hiding something.
Standards exist because they work—violating them causes problems. Untwisting cable pairs more than half an inch at termination points degrades performance measurably. Exceeding bend radius specifications damages internal wire structure. Using non-rated cable in plenum spaces violates fire codes and creates genuine safety hazards. Mixing cable categories within a single run creates bottlenecks limiting overall performance. Follow standards religiously.
DIY pitfalls catch homeowners regularly. Running data cables parallel to electrical wiring for extended distances causes interference and packet loss. Stapling cables too tightly deforms them. Using outdoor-rated cable indoors (or vice versa) violates codes and can fail prematurely. Terminating cables incorrectly—wrong wire order or poor punch-downs—causes intermittent failures that are absolutely maddening to diagnose.
Choosing unqualified installers costs more than hiring professionals initially. Warning signs include unwillingness to provide references from recent projects, quotes significantly below competitors without clear explanation, reluctance to follow standards or obtain required permits, lack of insurance or licensing, and inability to clearly explain their process. Qualified installers should hold certifications from BICSI or equipment manufacturers, carry liability insurance, provide detailed written quotes, and offer warranties on their work.
Some installers cut corners to win bids, then deliver substandard work. They might substitute cheaper cable than specified, skip proper testing protocols, or rush installation without attention to cable management. These shortcuts create problems you'll discover after they're gone and unavailable. Verify installers actually follow through on quoted specifications.
Author: Caleb Merrick;
Source: clatsopcountygensoc.com
Frequently Asked Questions About Network Cable Installation
Network cable installation demands careful planning, attention to standards, and realistic budgeting. Whether you're wiring a home office or outfitting a commercial building, core principles remain consistent: specify appropriate cable categories for your bandwidth needs, follow industry standards for installation and testing, invest in proper cable management from the start, and document everything thoroughly.
The upfront cost might seem significant, but quality installation provides decades of reliable service. Cutting corners to save a few hundred dollars often leads to expensive remediation work later. Choose qualified installers who follow standards, insist on proper testing, and maintain detailed documentation of your cable plant.
Your network infrastructure is as critical as electrical and plumbing systems in your building. Just as you wouldn't hire an unlicensed electrician, don't trust your network cabling to unqualified installers. The investment in professional installation and certification pays dividends through reliable performance and easy troubleshooting when issues arise.
Plan for growth, document thoroughly, and build quality into your installation from the beginning. Your future self will thank you when the network performs flawlessly and adapts easily to new requirements.
Related Stories

Read more

Read more


The content on this website is provided for general informational and educational purposes related to cloud computing, network infrastructure, and IT solutions. It is not intended to constitute professional technical, engineering, or consulting advice.
All information, tools, and explanations presented on this website are for general reference only. Network environments, system configurations, and business requirements may vary, and results may differ depending on specific use cases and infrastructure.
This website is not responsible for any errors or omissions, or for actions taken based on the information, tools, or technical recommendations presented.